|
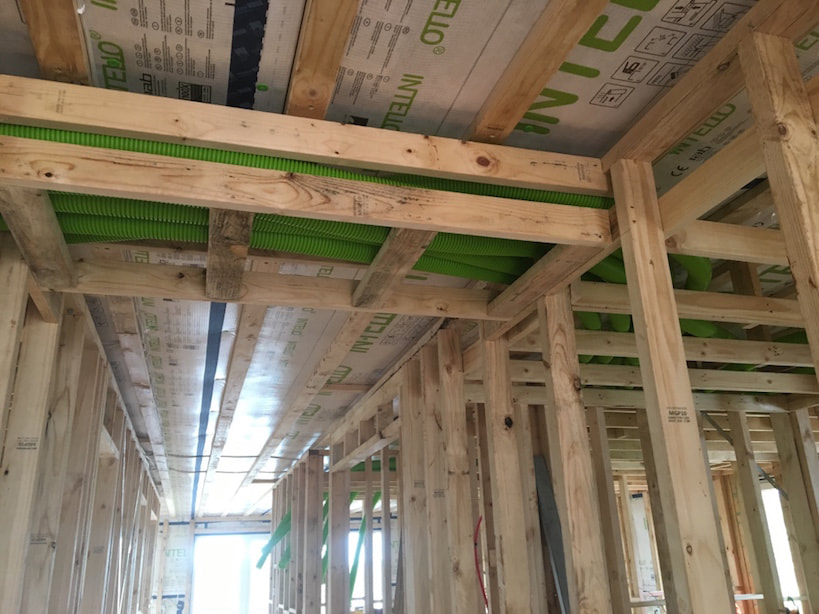
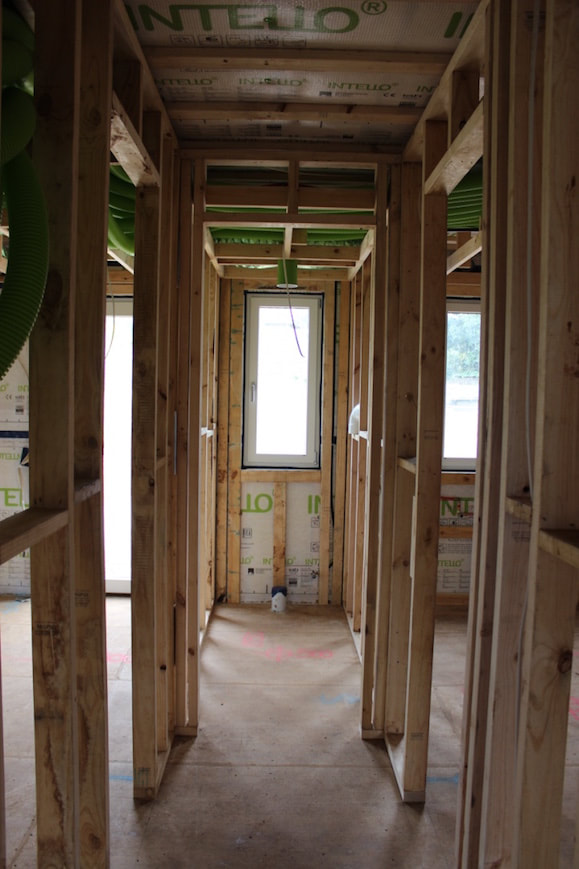
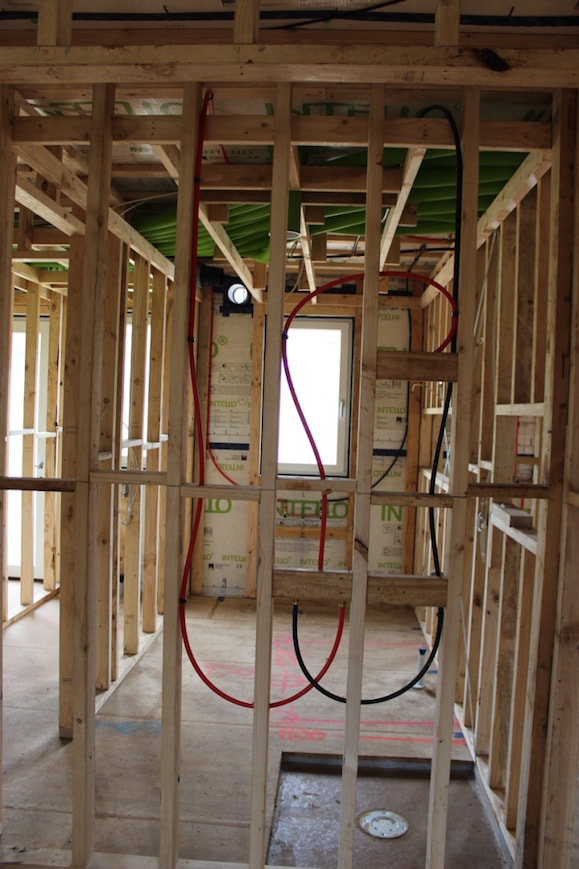
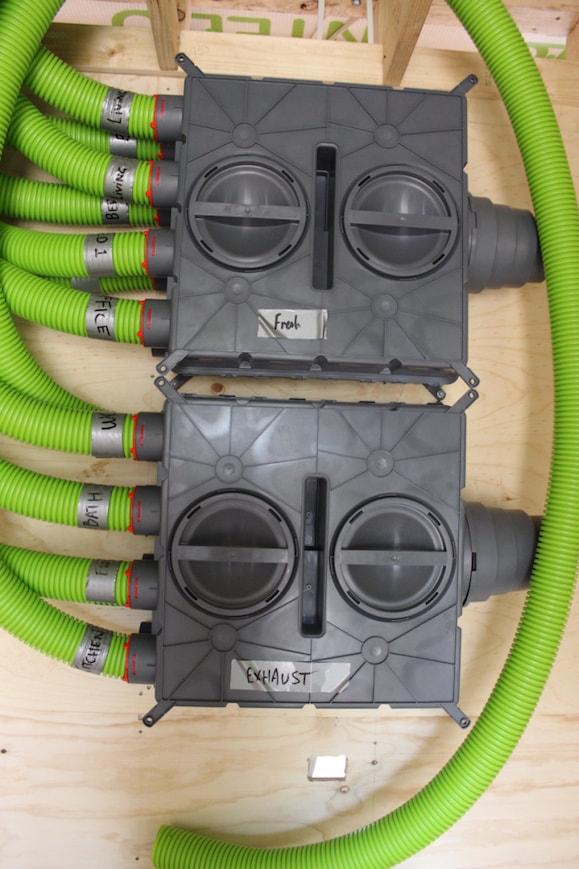
Unbelievably over 6 months have passed since the last blog and in that time we have finished the house and moved in! Where we left off last time was that we had achieved a Passive House standard air-tight house with .36 air changes per hour (ACH). From this point we continued building the inside walls and what was one large room started to become a home. The next Passive House element to be installed was the Mechanical Heat Recovery Ventilation (MHRV) system. I call this the lungs of the house because it brings in fresh air into the house, and exhausts the stale out. If a house is tighter than 5 ACH per hour then a mechanical ventilation system must be introduced. Every 'living room' of the home has a supply of fresh air, so for us bedrooms, living, rumpus and office indicated by the blue supply air on the below plan. The bathroom, WC, laundry, ensuite and kitchen have an exhaust outlet which is the red line on the plan. 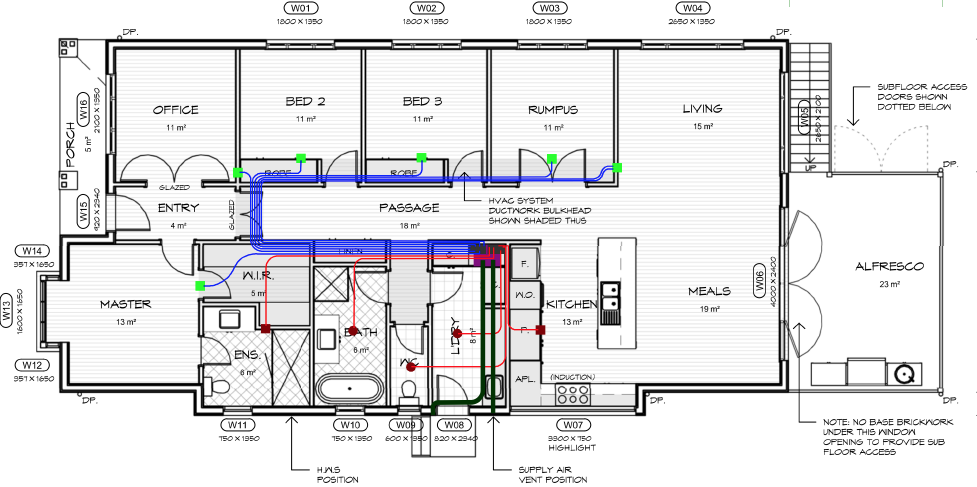 Its a fairly simple concept, as the house is air tight you must ventilate fresh air or the house is unhealthy and all sorts of problems arise, such as mould. The amount of fresh air to be supplied to each room is calculated by the volume of the room, so accordingly on our plans you can see that the living and meals area is supplied with 2 ducts of fresh air for example. The dark green lines show the ducts that vent from the outside to the MHRV. Its important to note that these have to be a minimum distance apart from each other, otherwise you would be short circuiting the fresh and exhaust air. This is the same for the living room fresh air and kitchen exhaust. So as to not jeopardise the airtightness our design kept all the ductwork inside the airtight wrap and used dropped ceilings and bulkheads to hold the ductwork. So the laundry, WC, bathroom and ensuite all have lowered ceiling heights, then above the robes and Rumpus is a bulk head to bring the fresh air ducts to those rooms.
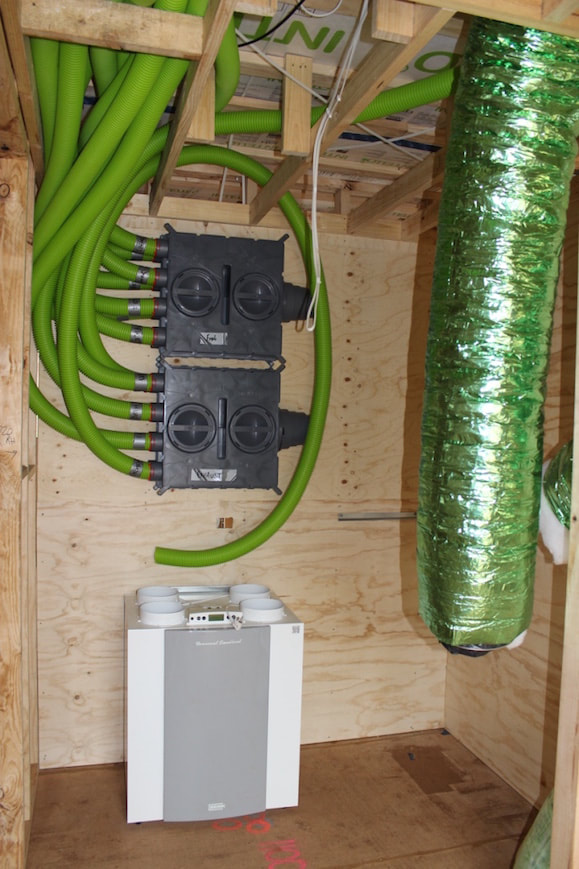
  In addition to supplying fresh air, the system as the name suggests utilises the temperature of the air inside the house to heat/cool the fresh air coming into the home. So the basic principle is fresh/supply air comes into the system, it runs through a heat exchanger to adjust the temperature of the fresh air, then goes from the system into the fresh air manifold. Each supply air duct is balanced (this is done when the house is finished) using air flow restrictors at the manifold so that the right volume of air can travel through the ductwork to each room. Then the extract air obviously works in reverse, exhaust coming into the manifold from the house, this goes into the system to utilise the heat and then ducts to outside. In addition to the heat recovery aspect, the MHRV also incorporates two filters, one of the fresh air coming in which removes pollen and dust so it doesn't clog the heat exchanger and the air being supplied to the rooms is fresh and clean. The other filter is on the exhaust so the air being taken from the home is filtered so the heat exchanger is not clogged with dust or debris.
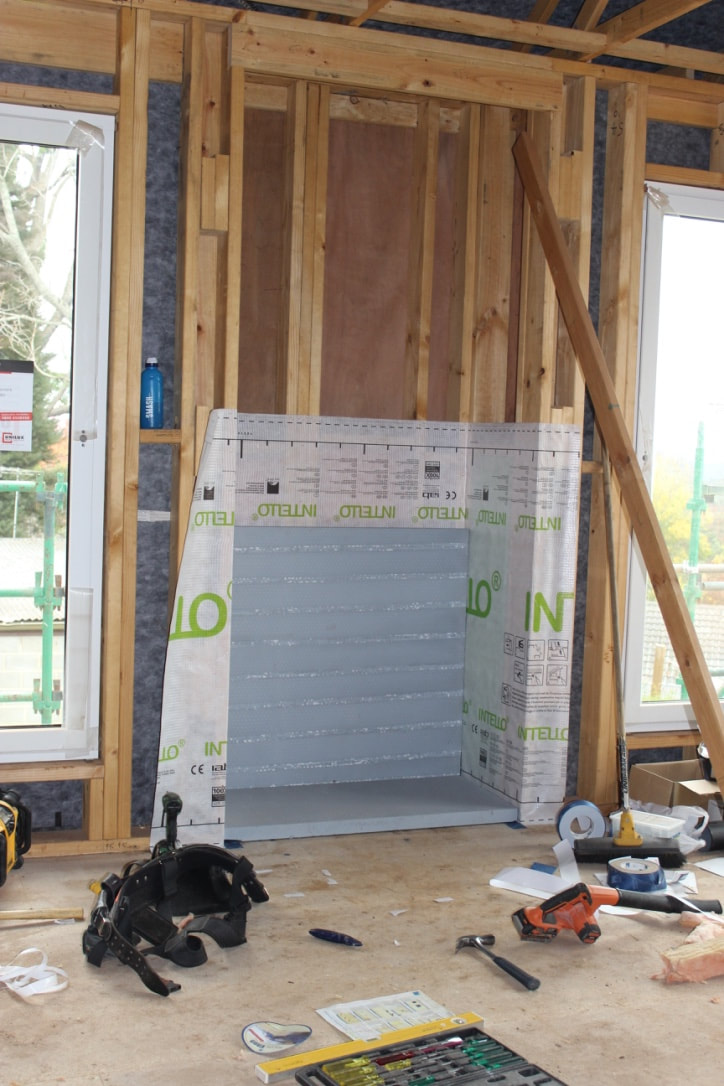
The MHRV system we went with is a BRINK Renovent Excellent 400 Plus which costs just under $8,000 supplied. It was installed by us and then balanced and commissioned once the house is complete. In terms of other heating and cooling, we are installing a 2kw Mitsubishi Split System which costs a little over $2,000 supplied and installed. Its crazy to think that the size of the split system that is sufficient for our whole house, is what a standard home would need just for one bedroom! We have also installed a solid fuel fire place which costs just over $3,000 for the supply of the fireplace and other materials required to install in. I remember when Devin was doing the Passive House Tradesmen course, one of my first questions about it was can you have a fire place? Devin was very reluctant to attempt a fireplace on his first Passive House, and initially we didn't include it in our plans. But for me building a traditional house in the hills calls for a fireplace, and so I put my foot down so to speak and it has been one of the most controversial and stressful elements of the house. The first element to consider is that as the house is air tight so the air supply to the fireplace must be external. That is most coonara style fireplaces use the air from inside the house to feed the fire which is off the table for us. The second element is that the fireplace has to be sealed and airtight to the house envelope. The way Devin approached it was that the fireplace was built on the inside of the air tight wrap and the flue and external air supply were the two points in which it penetrated the wrap and were sealed accordingly. We decided on the 'Ribe Insert' supplied by Euro Fireplaces
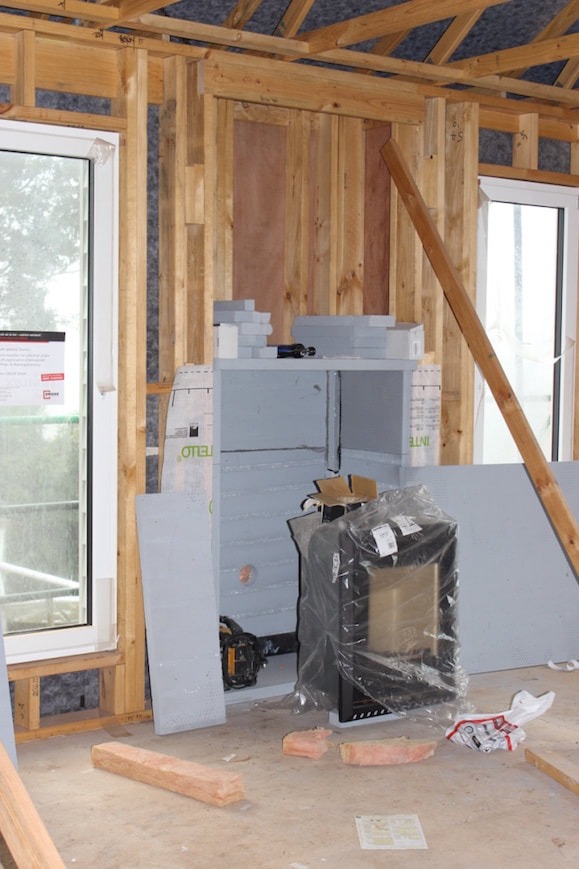
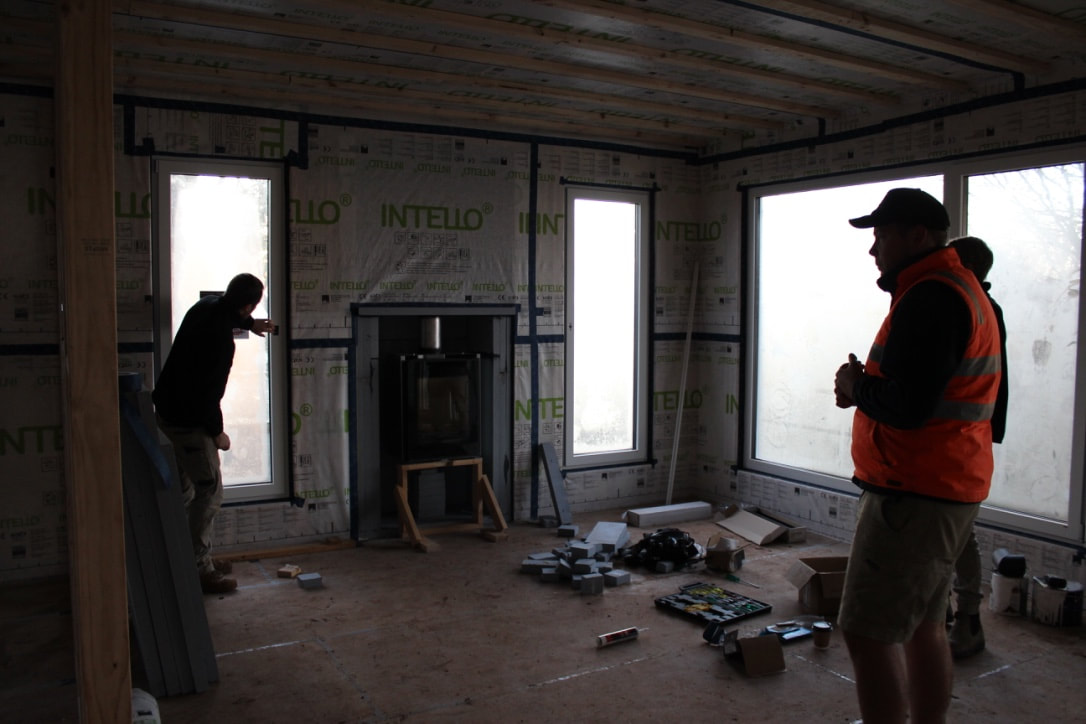 We initially installed the fireplace temporarily (hence the use of the prop holding the fireplace in the above photo) because you cannot block the supply air vent into the fireplace and Devin was very apprehensive of how much air would leak out of what is essentially a hole in the house. So it was a massive sigh of relief after the first air tightness test was passed and it was able to be installed fully. 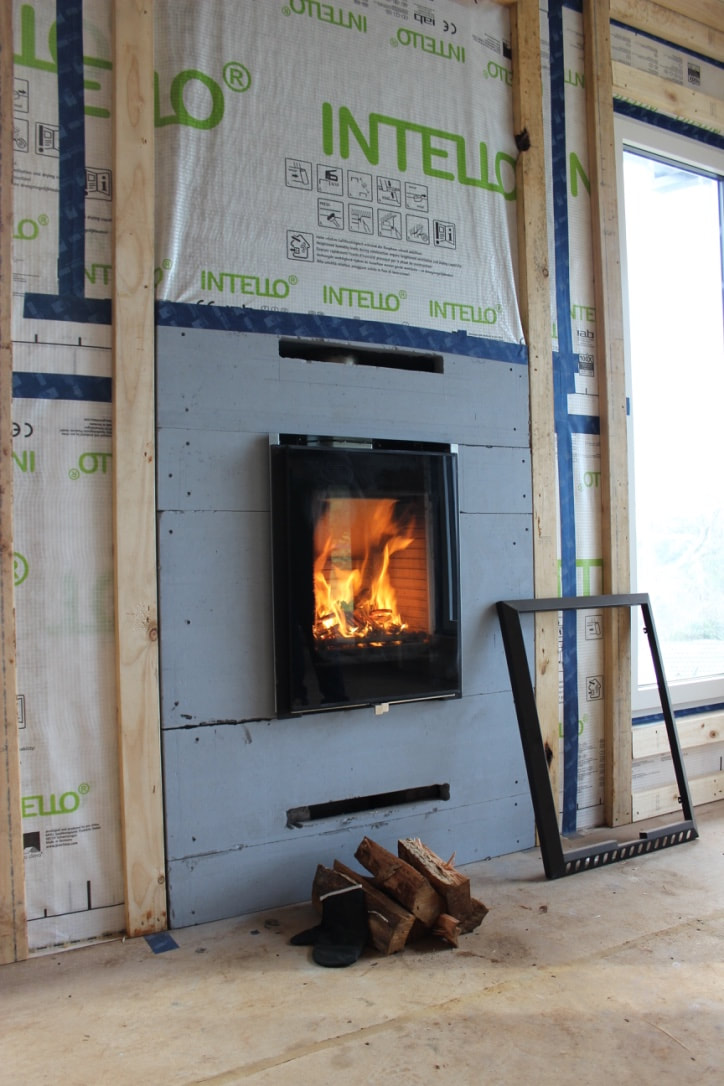 The fireplace works on convection, so there is no fan or electricity to operate the fireplace. Cooler air is drawn into the Skamol hot box through the bottom vent and the warm air comes out the top vent.
When building we had the fireplace on a few times, which the trades were pretty happy about, but since moving in over summer we haven't needed to use it but I'm definitely looking forward to winter nights here and am expecting the extra effort and stress it caused to all be forgotten.
0 Comments
 When designing our house, these were our basics requirements: - House size to be 18-20 'builders' squares (or 162- 180 square meters) - 3 bedrooms - Home office - 2 living areas - Master bedroom with ensuite - Family bathroom with seperate toilet - Detached garage (for Devins work materials and tools) - Detached car port As this is Devin's first construction of a Passive House, to make sure we achieve certification, he wanted to keep the exterior wall layout as simple as possible. Therefore the house is a simple rectangular shape, this is to help minimise thermal bridges (but more on that later) As you can see the main living areas are on the north side of the house, including the home office as we will use this space more than the Master Bedroom. The bathroom, ensuite and laundry are towards the south/west side. 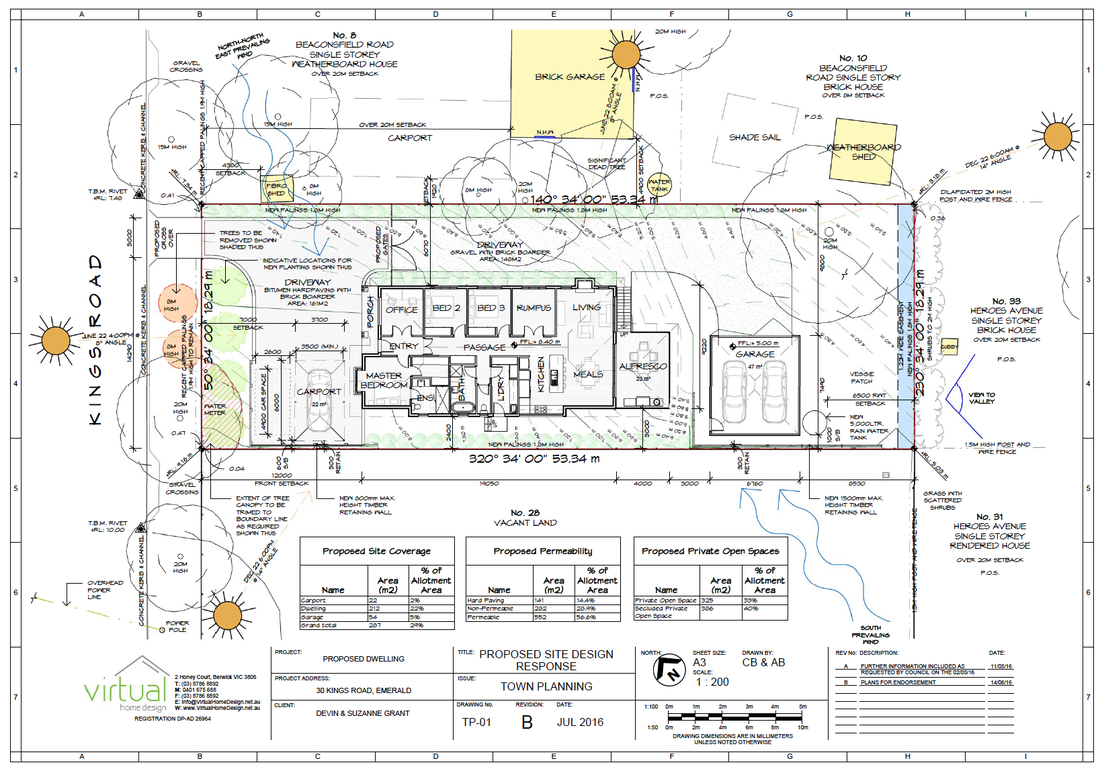 In regards to the size, 18-20 squares for a house is considered on the smaller side in Australia. There were a few reason for this. Firstly, Australia is known to have large homes, 27 squares (243 square meters) which is the average house size. A typical new home these days will boast spare bedrooms for guests or multiple living rooms and formal dining rooms. Personally, Devin and I do not wish to conform to the general mentality that bigger equals better. We don't want to work for the next 30 years to be paying off spare rooms. The second reason for building a smaller house is because we honestly don't know how much extra it is going to cost to build a certified Passive House. We have heard at seminars and from others in the industry that you can expect to pay anywhere from 10-20% more than what any other new '6 star energy' home would cost. In Europe the cited price difference for a Passive House is only a 5% increase in cost. Since Passive House is so new in Australia, there is no demand on Australian manufacturers for products that will comply with the Passive House standard, therefore naturally the products are going to cost more. So ultimately we wanted to make sure we could afford to build it. After Anthony our draftsman had completed the initial drawing concepts, it was over to Clare our Passive House consultant to literally run the numbers. This is done in the Passive House Planning Package (PPHP), which I will not attempt to explain as there is no way I could do it justice. Other than to say that every single detail is calculated and used, from Melbournes climate data, the altitude, what materials are to be used internally and externally on the house right down to how many people will be living in the house and much more. To achieve a certified Passive House there are very strict performance criteria that must be met. At this stage what we are most interested in, is how much the house needs heating and cooling. After all the ultimate goal for a Passive House is to eliminate the need for conventional heating and cooling. Therefore, specifically to be certified as a Passive House, the heating and cooling demand must be equal or less than 15KWh/m2 per year. So what does that mean? The way I like to think about it is that if a Passive House was a person it would need one apple (say 50 calories) a day to run. In comparison a '6 star energy' rating is based off 120KWh/m2, and would consume a burger (around 400 calories) every day. 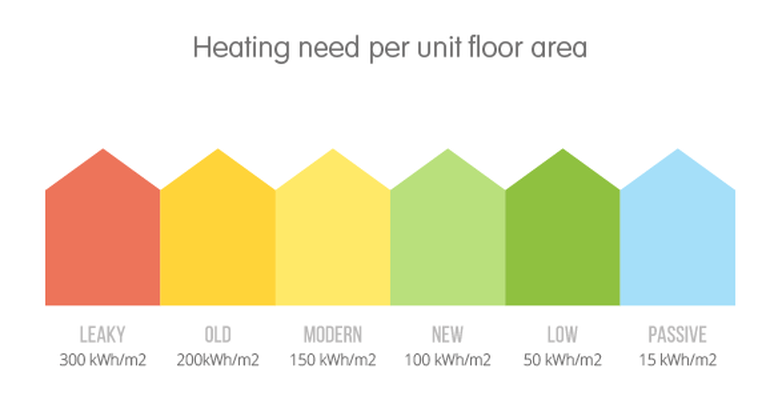 I have found this little diagram explains more clearly than I can the difference between a Passive House heating/cooling consumption compared to other buildings. To achieve this heating/cooling demand, Clare's report tells us what level of insulation and glazing requirements are needed. From this information we were able to start speaking to suppliers, primarily of window manufacturers to assess what was both available and financially viable. These rendered images Anthony made really started to give us a feel for the size of the spaces and what it would look like finished. 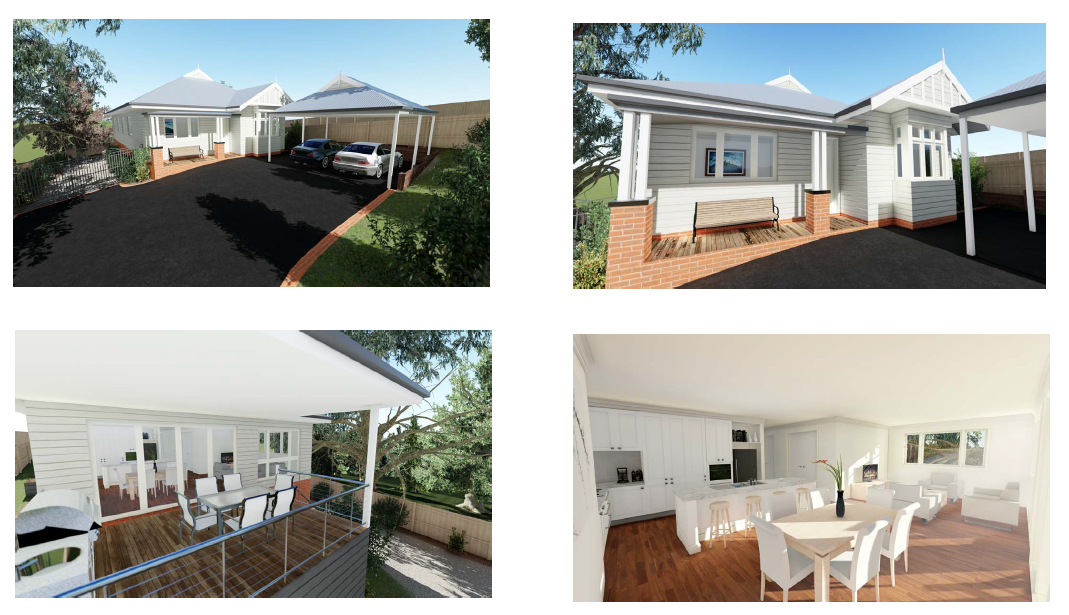 |
Who we areDevin & Suzanne are building a family home using a Passive House method. Categories
All
Archives
December 2018
|
 RSS Feed
